Showing posts with label All Food. Show all posts

Tuesday, January 25, 2011

Apricot Chicken

This recipe is easy to make and helps mix up "chicken dinner" night. I had some apricot jelly that I had left over from holiday cooking and decided to try to incorporate it into dinner. You can use this recipe with different jellies and cheeses. I'm sure it would be great with pepper jelly and pepper jack cheese, apple jelly and brie, etc.
Recipe:
2 chicken breasts
1 slice swiss cheese
4 tbs apricot jelly
Cayenne Pepper powder
Salt
Pepper

Pat chicken dry and then sprinkle both sides with salt, pepper, and cayenne powder. Cook in an oiled skillet over medium heat until chicken is cooked through. Top each chicken breast with jelly and half a slice of swiss. Remove from heat and put pan top on to hold in heat to melt the cheese. Serve when cheese has melted.

Jake has been trying to help out in the kitchen and committed to make a side to go along with our apricot chicken and salad. He tackled the Kraft Home Style Mac and Cheese kit :)


Pretty delicious. Can't go wrong with mac and cheese topped with toasted bread crumbs.

Thursday, January 20, 2011

Chicken and Dumplings.. and the importance of first-year-o-marriage back ups

So this week I figured out I like the idea of chicken and dumplings way more then I liked the actual dish. I came across an interesting recipe on the Pink Parsley blog. It is a chicken and dumpling dish that uses Salsa Verde which adds a kick and herb cornmeal dumplings which adds more flavor.

It took about an hour to put together but I had been cold all day and had the motivation to make a super comforting food.


        Recipe found here.

The first few bites tasted awesome. It had a lot of flavor, spice, and was incredibly rich. However, it was way too heavy for Jake and I to eat as a meal. We had ate about 1/4 of our plate and agreed that the rest was going to have to go in the fridge for another time.

In came my first-year-o-marriage back up food. Since I like to try new recipes quite a bit, it is crucial I have back up food in case the recipe is a flop. Some of these back ups include hot pockets, chicken pot pies, skillet meals, and of course toasted PB&J.

I think I got way more compliments on my 3 minute PB&Js then the hour long chicken and dumplings with fresh cut herbs, but I'll take what I can get :)

Thursday, January 13, 2011

Lemon Pepper Chicken Home Made Crouton Salad and Fresh Bought Ravioli Ridiculousness

One of the things I will miss about my old job is its close location to Eastern Market. They have a large indoor market with all sorts of fresh and hand made foods. I particularly love the home made pasta section. Earlier this week I bought these little beauties:
Hand made cheese ravioli with pretty stripes.
I boiled them for about 3 minutes and they were done! Fresh pasta has so much more flavor then store bought pasta and cooks in about a third of the time. I try to buy it anytime I come across it.
I topped it with my home made marinara sauce and....
Yummmy ridiculousness!
I know Jake doesn't consider food a meal without a meat so I grilled up some easy lemon pepper chicken.
Recipe:
4 chicken strip cuts
Lemon pepper seasoning
2 tbs olive oil

Heat oil in pan over medium heat. Remove chicken strips from package and pat dry. Season both sides with the lemon pepper seasoning. Cook for about 8 minutes flipping chicken half way through. Remove once chicken is fully cooked through. Makes 2 servings.


I topped mine with a raspberry walnut light dressing and Jake went with the light ranch. I forgot to buy croutons at the store so I thought I would give home made croutons a shot.
Recipe:
4 pieces of Healthy White or Wheat bread cut into bite sized cubes
2 tbs olive oil
1/2 tbs of salt
1/2 tbs of pepper
1/2 tbs of garlic powder
1 tbs dried parsley

Preheat oven to 350 degrees. Toss bread cubes with oil. Add seasoning and gently toss again. Arrange on tin foil lined baking sheet in a single layer. Bake for about 10-15 minutes or until bread is golden brown. 

They turned out pretty good and definitely more healthy then store bought croutons. I might try adding Parmesan cheese next time as well.

Wednesday, January 12, 2011

Home Made Marinara Sauce

I have always wanted to try to make marinara sauce from scratch. I don't know if it's the Italian in me or my super pickyness when it comes to marinara sauce - but this is a sauce I feel like I should master. During my lunch break I bought some fresh tomatoes, onions, and what I thought was garlic....

Has the shape of garlic and the store labeling of garlic...
But not garlic at all...
I swear it's staring at me saying (in a squeaky British accent for some reason..) "Ohhh nooo I'm an onion, not garlic silly.."

Sigh.. I told you all I was not a master chef...

After being humbled by my garlic failure, I returned to my marinara mission. I had some dried minced garlic and garlic powder that would just have to do. I prefer marinara sauces that taste light, slightly spicy, and aren't chunky.


Recipe:
5 tomatoes deseeded and chopped
1/2 yellow onion chopped
2 cloves of garlic minced
10 basil leaves chopped
1/4 cup white wine
4 tbs olive oil
1tbs dried oregano
1 tbs salt
1/2 tbs pepper
1/2 tbs cayenne pepper powder
1/2 tbs garlic powder
1 tbs dried parsley

Heat oil in a pot over medium heat until hot. Reduce heat to medium low. Add onions and garlic and cook until onions are translucent and soft (about 7-10 minutes). Add wine to deglaze bottom of pot. Add tomatoes and basil. Let simmer for a few minutes. Take a hand blender and blend until no big chunks can be seen. Make sure to wear long sleeves and an apron since this can get messy. (There will be less of a splash if you keep the hand blender submerged the whole time.) Add remaining ingredients and stir. Add more or less of the spices depending on your taste. Let simmer for 10 minutes. Makes about 4-6 servings. 


While I really like how the sauce turned out, I'm going to tweak this recipe slightly. (i.e. remove tomato skins, add tomato paste, and try roasting the garlic and tomatoes). Hopefully I can do this in the next week or so and update the recipe :)

Sunday, January 9, 2011

Movie/Wii Night = Spiced Popcorn

Last night Jake and I had some friends over for a movie/Wii night. Dinner for Shmucks was hilarious as was watching Jake get beat in all the Wii games he thought he "owned" :) I found a recipe for Spiced Popcorn  and tweaked it slightly. It was pretty tasty and easy to make.

Recipe:
2 bags of popcorn popped
1 stick of butter
4 tbs brown sugar
2 tsp chili powder
2 tsp ground cumin
1 tsp cayenne
2 tsp garlic powder
2 tsp salt

Place popped popcorn in a large bowl or pot that has some sort of top. Melt butter in sauce pan over medium heat. Add the rest of ingredients (excluding popcorn) until well combined. Pour butter mixture over popcorn some what evenly. Place top over bowl and shake gently until mixture has coated all popcorn. Transfer popcorn mixture to a tin foil lined baking sheet. Bake at 375 degrees for 15 minutes and serve.
Jake's Take: Thinks sprinkling Seasoning Salt over popcorn is easier and quicker... But still liked the final result and thought it was a good spin on movie popcorn.

Thursday, January 6, 2011

Chicken Cordon Bleu Kind Of Night

Our neighbors are moving out soon and they gave us their bedroom set! We are so excited and matching Ikea  furniture is a definite upgrade from our college "set" :) I'll post some pics once the bedroom make over is done.

I knew tonight we would be busy assembling dressers and moving furniture upstairs so I wanted an easy and tasty dinner to make tonight. I came across a Chicken Cordon Bleu recipe and since I've never made this before, thought it would be a good opportunity.

I came across a recipe which looked awesome especially since it included a white wine sauce.


I served it with some brown rice and called it dinner :)

Recipe from http://allrecipes.com//Recipe/chicken-cordon-bleu-ii/Detail.aspx

Ingredients

  • 6 skinless, boneless chicken breast halves
  • 6 slices Swiss cheese
  • 6 slices ham
  • 3 tablespoons all-purpose flour
  • 1 teaspoon paprika
  • 6 tablespoons butter
  • 1/2 cup dry white wine
  • 1 teaspoon chicken bouillon granules
  • 1 tablespoon cornstarch
  • 1 cup heavy whipping cream

Directions

  1. Pound chicken breasts if they are too thick. Place a cheese and ham slice on each breast within 1/2 inch of the edges. Fold the edges of the chicken over the filling, and secure with toothpicks. Mix the flour and paprika in a small bowl, and coat the chicken pieces.
  2. Heat the butter in a large skillet over medium-high heat, and cook the chicken until browned on all sides. Add the wine and bouillon. Reduce heat to low, cover, and simmer for 30 minutes, until chicken is no longer pink and juices run clear.
  3. Remove the toothpicks, and transfer the breasts to a warm platter. Blend the cornstarch with the cream in a small bowl, and whisk slowly into the skillet. Cook, stirring until thickened, and pour over the chicken. Serve warm.
Jake's Take: Liked it a lot but want to add a bread crumb crust next time. I agree with that as well.

Tuesday, January 4, 2011

Pepper Jelly On A Mission

Like I said yesterday, my goal was to incorporate delicious pepper jelly into dinner this week. Well tonight was the night :)  The pepper jelly was awesome with the turkey sausage and green beans. It added a nice sweet and spicy flavor that wasn't too strong.

Pepper Jelly Green Beans
Recipe:
Steamed green beans
Salt
Pepper
1 tbs of pepper jelly
1 tsp olive oil

Steam green beans and then toss with remaining ingredients.


Turkey Sausage Pepper Jelly Stuffing
Recipe:
1 package of italian turkey sausage
3 tbs pepper jelly
2 cups of stuffing prepared as directed on package

Remove skin from turkey and place in cooking pan over medium heat.  Add pepper jelly and mix until combined. Break up turkey into bite size peices as it cooks. Remove from heat when turkey is fully cooked. Add turkey mixture to stuffing, toss, and serve.

Jake's Take: Added a sweet taste to dinner and would eat it again.

Monday, January 3, 2011

An Ode to Pepper Jelly

Best things in the world that start with "P":
Peace
Puppies
and Pepper Jelly

I am averaging one jar of pepper jelly a week.. no joke. I seriously have a problem. Something about the sweet/spicy combo has me hooked. Here is what I've been eating for the past week and as we speak:

Yum. Cracker with pepper jack cheese and pepper jelly. I am determined to incorporate this jelly into a full on dinner this week.... Wish me luck!

Thursday, December 30, 2010

Healthy Spinach Dip

This is one of my all time favorite dips. It is super healthy and has a ton of flavor. Like most women, I found out from my doctor that I had pretty low iron and so began my search for a tasty spinach dish I would enjoy eating. I tweaked a few spinach dip recipes to make it healthier. You can also vary the ingredients to your liking as well (i.e. add more cream cheese for a creamier dip, use more garlic for a sharper taste, etc)

Recipe:
1 package frozen chopped spinach
1 tsp salt
1 tsp pepper
1 1/2 tsp minced garlic
1 1/2 tsp minced onion
1 1/2 tsp chopped basil
1/2 tbs butter
1 tbs chopped parsley
1 tbs lemon juice
2 oz fat free cream cheese
1/4 cup of shredded Italian cheese
1/4 cup of Parmesan cheese

Cook and drain spinach. Over medium heat, add butter and saute spinach for about a minute. Reduce heat to medium low and add remaining ingredients. Heat and stir until all cheese has melted and the dip is at a creamy consistency. Transfer to serving bowl and sprinkle with Parmesan cheese. I like to serve this with baked tortilla chips.

Jake and I are like 3 year olds when it comes to vegetables. If it doesn't taste good, it's just not happening. That's also why you will probably never find brussel sprouts on this blog.. I am all for being healthy and eating well so I do try to make all of our vegetable dishes taste awesome. Or when all else fails add cheese or a healthy dose of Ranch :)

Jake's Take: (will update soon, but I know he likes this dip and appreciates that it is tasty and healthy at the same time. He requests it at least once a week :)  )

This may be the last post of 2010 since Jake and I are off to PA to hit the slopes to ring in the New Year!

Wednesday, December 29, 2010

Cheddar Bacon Scones

These scones are a meal in themselves and are great to grab on the go. I mean how can you go wrong with bacon and cheese?
Oh yumm.. you can make these a day or two in advance and are a great addition to a brunch.

Recipe: (adapted from The Pastry Queen)
3 cups all-purpose flour
1 tbs baking powder
1 tsp salt
2 tsp black pepper
1 stick chilled, unsalted butter, cut into cubes
1 1/2 cups grated cheddar cheese
4 green unions, thinly sliced
10 slices of bacon, diced and cooked with fat drained
3/4 - 1 1/2 cups buttermilk
1 egg
2 tbs water

Preheat oven to 400 degrees. Mix first 4 ingredients together. Add butter cubes and mix with a mixer on low speed until mixture is has butter flour bits the size of peas. Add cheese and mix until blended. Add bacon, green onion slices, and 3/4 cup buttermilk. Add 1 tbs of buttermilk if mixture is still too dry and repeat until dough can be formed into ball. Place dough ball on floured surface and roll out until it is 1/2 thick. Cut dough into 10 wedges and place on ungreased baking sheet. Combine water and egg and brush each scone with the egg wash. Bake 18 minutes or until golden brown.


Jake's Take: Thought they were very filling and liked tasting the bacon in every bite. Suggested adding some more cheese on the top. Yumm..

Monday, December 27, 2010

Not Quite Red, Red Velvet Cake

I attempted to make red velvet cake for Christmas dinner this year. You can see the results..


So close to red but not quite! Eh, I tried... Thankfully the cake tasted awesome.
I found this recipe on on the Smitten Kitchen blog (http://smittenkitchen.com/2007/09/red-velvet-cake/).
The blog has some helpful pointers on making the cake more red. Next time I make this cake, I will use less cocoa powder and that should do the trick. I also topped mine with crushed candy canes to make it more festive. The cake is really delicious and I would recommend it!

Yield: 3 cake layers
1 tablespoon unsalted butter
3 1/2 cups cake flour
1/2 cup unsweetened cocoa (not Dutch process)
1 1/2 teaspoons salt
2 cups canola oil
2 1/4 cups granulated sugar
3 large eggs
6 tablespoons (3 ounces) red food coloring or 1 teaspoon red gel food coloring dissolved in 6 tablespoons of water
1 1/2 teaspoons vanilla
1 1/4 cup buttermilk
2 teaspoons baking soda
2 1/2 teaspoons white vinegar.
1. Preheat oven to 350 degrees. Place teaspoon of butter in each of 3 round 9-inch layer cake pans and place pans in oven for a few minutes until butter melts. Remove pans from oven, brush interior bottom and sides of each with butter and line bottoms with parchment.
2. Whisk cake flour, cocoa and salt in a bowl.
3. Place oil and sugar in bowl of an electric mixer and beat at medium speed until well-blended. Beat in eggs one at a time. With machine on low, very slowly add red food coloring. (Take care: it may splash.) Add vanilla. Add flour mixture alternately with buttermilk in two batches. Scrape down bowl and beat just long enough to combine.
4. Place baking soda in a small dish, stir in vinegar and add to batter with machine running. Beat for 10 seconds.
5. Divide batter among pans, place in oven and bake until a cake tester comes out clean, 40 to 45 minutes. Let cool in pans 20 minutes. Then remove from pans, flip layers over and peel off parchment. Cool completely before frosting.
Cupcake variation: Since this has been published, many readers have written in to express that it adapts well to cupcakes. The yield is approximately 35 cupcakes, with the liners filled only 3/4 of the way, and the baking time should be between 20 to 25 minutes, but check in on them 2/3 of the way through in case your oven gets the job done faster.
Cocoa Notes
  • Some red velvet cakes have no cocoa, others have up to half a cup. The less cocoa, the brighter the red, and the less food dye is needed to give it the desired hue. This cake has more cocoa and quite a bit of red dye, but as you cans see from the picture, it is a real stand-out red. Feel free to use less, but make sure you dissolve it in 6 tablespoons of water to compensate for any moisture lost.
  • Dutch versus Non-Dutched cocoa: This recipe uses baking soda, so it calls for non-Dutch-Processed cocoa. The reason is that Dutch-Process cocoa is neutral and will not react with baking soda, so it can only be used in 1) recipes with baking powder or 2) recipes with enough other acidic ingredients that will compensate for the lack of acidity. However, you’ll notice that this recipe has both vinegar and buttermilk in it, or quite a bit of acidity, leading me to wonder if either kind of cocoa could be used with success. I had non-Dutch on hand, so I used it, but if you only have Dutch and try this recipe, let us know if it works. Personally, I prefer the Dutched stuff because it usually is of a higher quality with a more delicate chocolate flavor.
Cream Cheese Frosting
Adapted from several sources
Makes 6 cups
8 ounces cream cheese, room temperature
1/2 cup (1 stick) butter room temperature
3 cups confectioner’s sugar, sifted
1 teaspoon pure vanilla extract
Place cream cheese and butter in a medium bowl. With a handheld electric mixer, beat until light and fluffy, about 2 minutes. Add sugar and vanilla. Beat, on low speed to combine. If too soft, chill until slightly stiff, about 10 minutes, before using.
Icing Notes:
  • Technique: Cake decorators will always tell you to ice a cake in two batches, first a “crumb layer” and then the more decorative one. Though I rarely bother, in this cake in particular, with its dark hue barely disguised by a thin layer of frosting, it is especially helpful. To do this, place a small amount of frosting on the cake and spread it over the entire surface that will be iced, thereby anchoring wayward crumbs in place so that they will not mess up the final product. A few minutes in the freezer or longer in the fridge will firm this up so that you have an ideal surface to build the real layer of frosting upon.
  • Quantity: The recipe here creates an amount of frosting that allows for a thin coat between and over the cake layers. I found it to have the ideal cake-to-frosting balance for this recipe. However, you might want to double the recipe if you prefer a more decadent, padded frosting layer.
Jake's Take: Thought the cake was good and moist. He also likes a more cream cheese heavy frosting which I do too. He liked the crushed candy canes on top and would like them to cover the sides of the cake as well. Note: The crushed candy canes need to be almost in powder form since you don't want anyone biting down on a big piece and hurting a tooth.

Mint Chocolate Cookies

Ever since Jake saw a picture of some green mint cookies on the back of my cooking magazine, he made me swear to him that I'd make them for Christmas.

These cookies are really good and their green color makes them festive for Christmas or St. Patty's Day. You can also add some chocolate chips if you need a better chocolate fix. They would also work well as an ice cream sandwich using chocolate ice cream.  

Recipe:
1 package of Betty Crocker Sugar Cookie mix along with ingredients to make them
3 tbs mint extract
Few drops of green food coloring
1 package of Andy's Creme De Menthe chocolate mints

Prepare sugar cookies as directed. Chop Andy's mints into small pieces. Add mints, extract, and as much food coloring as desired to sugar cookie dough. Mix and form small balls to place on cooking sheet. Bake at 375 degrees for 9-11 minutes. Makes about 16 good sized cookies.

Jake's Take: Jake loved these cookies and suggested making a "cookie sandwich" with 3 of them... I however I wouldn't recomend this unless you're prepared for a sugar coma. This recipe is great for people that love mint.

Sunday, December 26, 2010

Emily's Peanut Chicken Noodles

Thanks to Emily for making such a great dinner! This dish makes a great dinner since it has a lot of flavor but is still pretty healthy.
Sorry for the bad picture quality! My real camera was MIA for this meal..

Emily's Recipe:

1 lb boneless, skinless chicken breasts
1/2 cup smooth natural peanut butter
2 T soy sauce
2 t minced garlic
1 1/2 t chile-garlic sauce, or to taste
1 t minced fresh ginger
8 oz whole wheat spaghetti (i used a whole 13 oz box and the ratio still seemed okay...up to you- more for leftovers!)
12 oz bag fresh or frozen vegetable medley, such as carrots, broccoli, snow peas, etc.

Put a large pot of water on to boil for pasta.
Meanwhile, place chicken in a skillet or saucepan and add enough water to cover; bring to a boil. Cover, reduce heat to low and simmer gently until cooked through, 10-12 minutes. Transfer chicken to cutting board. When cool enough to handle, shred into bite size strips.
Whisk peanut butter, soy sauce, garlic, chile-garlic sauce and ginger in a large bowl.
Cook pasta in boiling water until not quite tender, about 1 minute less than specified in package directions. Add vegetables and cook until both pasta and vegetables are just tender, 2 minutes more. Drain, reserving 1 cup of cooking liquid. Rinse pasta and vegetables with cool water to refresh. Stir reserved cooking liquid into peanut sauce, then add pasta, vegetables, and chicken. Toss well to coat.
Serve warm or chilled.
Makes 6 servings, 1 1/2 cups each

Ann's Cake Cookies

Thanks to Ann for making these delicious cookies! These cookies are tasty and pretty easy to make. Slightly crunchy on the outside and chewy on the inside. Yumms...

Sorry for the bad picture quality (forgot my camera so my cell phone had to make due).

Ann's Recipe:
1 box of devil's food cake mix
2 eggs
1/3 cup vegetable oil
Powdered sugar
Hershey Kisses

Mix the cake mix, egg, and oil together.
Roll into small balls (smaller than you'd think).
Roll each ball in powdered sugar before you put it on the pan.

Bake for 8-10 minutes at 350 then place a Hershey kiss in middle. Ann used chocolate, but you can use caramel, mint, or peanut butter! Yields about 25-30 cookies.

You can use the same recipe with funfetti cake mix, and that make delicious cookies too.

Monday, December 20, 2010

Special Dinners With Free Food

Since I started this blog right before the holiday madness encored, I'm worried I might not be able to update it as much as I would like in the next week or so. Jake and I are headed home to Richmond for Christmas celebrations tomorrow afternoon where luckily both our families live less then a few miles apart! We met at Virginia Tech and had no idea we lived so close to each other.

Anyways, I wanted to try to squeeze in one more post before we left. My previous job as a political media buyer and planner had some awesome perks - one of which was my clients sending me some great cuts of fillet mignon. Jake was having a tough Monday so I decided to whip up his all time favorite dinner which, lucky for me and my wallet, was fillet mignon with roasted asparagus.
This dinner was easy and quick to make, yet tasted very elegant. Needless to say, Jake's Monday got better.

Recipe:
2 Fillet Mignons
Olive Oil
Salt and Pepper
Garlic Powder
2 Tbs Butter
1/2 Tbs of Chives
1/2 Tbs of Parsley
1 pound Asparagus

After the fillets were defrosted and dried, I rubbed them with some olive oil and seasoned both sides with salt, pepper, and garlic powder. I then seared them in a pan over medium heat to brown the top and bottom. They were finished off in the oven at 350 degrees for 6-8 minutes.

While they baked, I made a quick herb butter. I took 2 tbs of room temperature butter and mixed it with garlic powder, salt, pepper, chives, and parsley.

Once the fillets are removed from oven, plate and serve with a scoop of herb butter on top.

As for the sides, I made roasted asparagus with hollandase sauce and mashed potatoes. For the roasted asparagus, I tossed them in olive oil, arranged them on a baking sheet, and sprinkled with salt and pepper. Broil them for 15 minutes or until they look crisp.

Not going to lie, I used packaged mashed potatoes and a mix for the hollandaise sauce..  Don't judge me.

Jake's Take: Loved this meal and thought he was being treated to a restaurant night. What man doesn't love meat and potatoes?? Thought the herb butter gave the meat a very luxurious taste. He also ate my left overs which I still have mixed feelings about...

Sunday, December 19, 2010

Holiday Apps, Drinks, & General Merriness

Jake and I recently had a Holiday Party which ended with a lot of empty liquor bottles in our house and appetizer plates with crumbs too small for a mouse... Sorry, we just finished watching the Grinch..
On the list for appetizers were Chocolate Bacon Bites (recipe in previous post), Angel Cinnamon Wings, Raspberry Sugar Cookies, Baked Brie, and Sticky Delicious Ham Sandwiches.

I'm going to start off with my all time favorite appetizer, the Sticky Delicious Ham Sandwiches. Let's just say this blog was very close to being called Sticky Delicious Ham Sandwiches & Other Life Adventures...
Let's take a look at these bad boys:

Um yummm... I promise these will be a hit at any party and the recipe is pretty easy.
Recipe:
24 bite size potato party rolls
1 package Swiss cheese
1 package sliced ham
1 1/2 sticks of butter
4 tbs brown sugar
2 tbs spicy mustard
2 tbs Worcestershire sause
Poppy seeds

Build mini ham and swiss sandwiches and place in a greased baking dish. Bring butter, brown sugar, mustard and Worcestershire sause to a boil. Pour entire mixture over ham sandwiches making sure each one is covered. Sprinkle poppy seeds over sandwiches. Cover in foil and refrigerate over night so that sandwiches can marinate in the delicious sticky sauce. Leave covered and bake in oven at 350 degrees for 10 minutes. Take cover off and continue to bake at 325 degrees for another 10 minutes.
Once the sandwiches have cooled, transfer to serving plate. These can be made up to a day in advance and stored in a zip lock bag.

Jake's Take: Angered that he had to share them with our party guests..

Raspberry Sugar Cookies
My sister and I perfected these cookies last Christmas and there's really nothing not to love about them. I use a packaged cookie mix because I have issues making cookies from scratch along with pancakes.. don't ask..
Recipe:
1 package Pillsbury Sugar Cookie mix along with the ingredients it requires
Raspberry jam
1 1/2 cups powdered Sugar
3 tbs lemon juice
2 tsp lemon zest

Preheat oven to 325 degrees. Make sugar cookie mix according to instructions on package. Form dough into log and wrap in parchment paper. Place in freezer for 15 minutes. For raspberry cookie filling, take about 1/2 cup raspberry jam and mix in 1 tbs powdered sugar and set aside.  Once cookie dough has hardened, cut the log into 1/2 inch rounds. Place on baking sheet lined with parchment paper. Use your thumb and fingers to create a small well in each cookie to hold raspberry mixture. Make sure there is a good amount of dough between the bottom of your well and the baking sheet so that raspberry mixture doesn't go through when baked. Spoon small amount of raspberry mixture into each cookie well and bake at 350 degrees for 10-15 minutes or until golden. For lemon glaze put remaining powdered sugar in bowl and slowly mix in lemon juice. Use as much lemon juice as you like to get the glaze consistency you prefer. Mix in lemon zest and set aside. Once cookies have completely cooled (if not completely cooled, the raspberry center may fall out), remove from cookie sheet and place on cooling rack. Use a fork to drizzle lemon glaze of cookies and enjoy! You should be able to get about 20 cookies out of this recipe depending on size.

Jake's Take: Thinks the softer the better regarding a lower baking time. These cookies will be more fragile of course but may be worth it since they will literally melt in your mouth. Sometimes messy cookies are the best cookies.

Cinnamon Angel Wings
These are light and crispy cookies which are perfect for munching on. They aren't too sweet and don't feel too heavy like most Christmas cookies do. I might try to incorporate some fruit/jam in these next time since they have a tendency to be dry. I'm sure the use of apple butter or jam would be delicious.
Recipe:
1 sheet of puff pastry thawed out
Cinnamon
Sugar
1 egg beaten with splash of water
Preheat over to 400 degrees. Lay thawed out puff pastry on cutting board and brush lightly with egg wash. Combine sugar and cinnamon and sprinkle in thin layer over pastry. Roll pastry towards center from opposite ends until touching in the middle. Cut 1/2 inch rounds from log shaped rolled pastry. If the dough becomes too soft you can put it in the freezer for 10 minutes or until hard. Place rounds on parchment paper covered baking pan. Brush tops of rounds with egg wash and sprinkle with cinnamon sugar mixture. Bake at 400 degrees for 15-20 minutes or until golden brown.
Jake's Take: Thought they were a little dry and suggested having something like whipped cream for dipping.
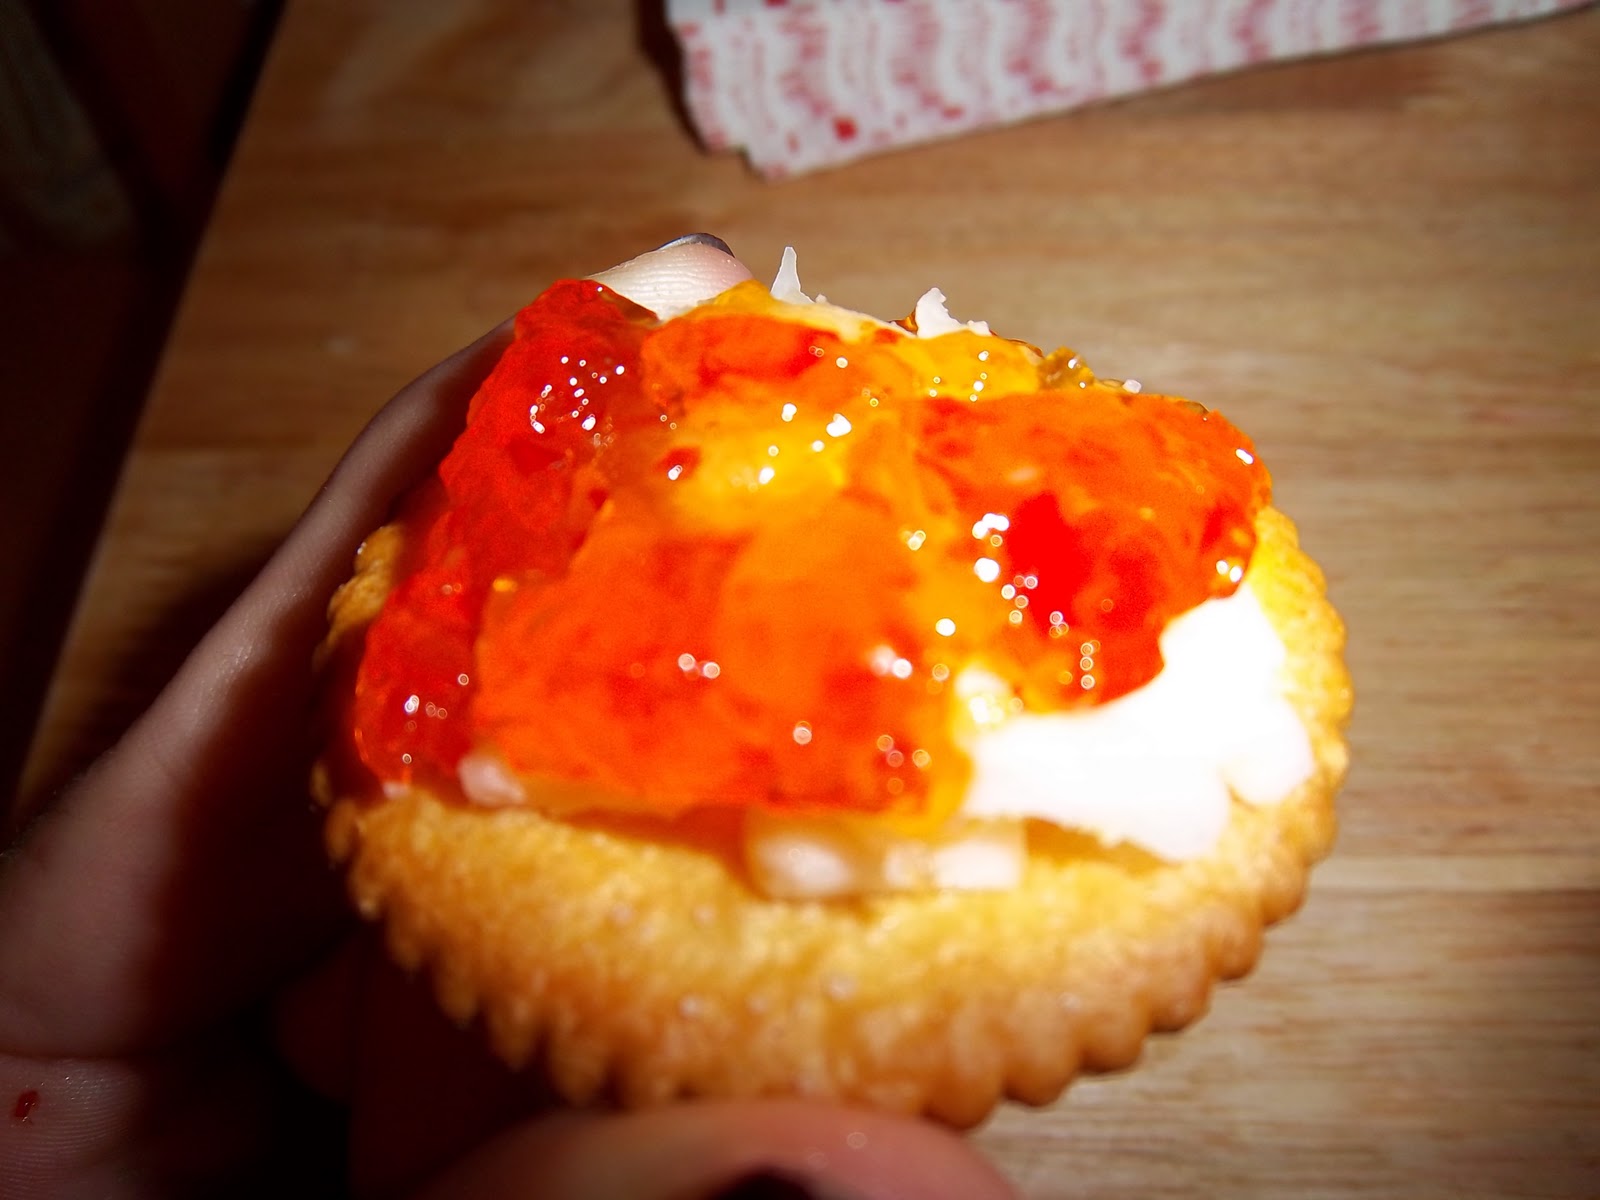
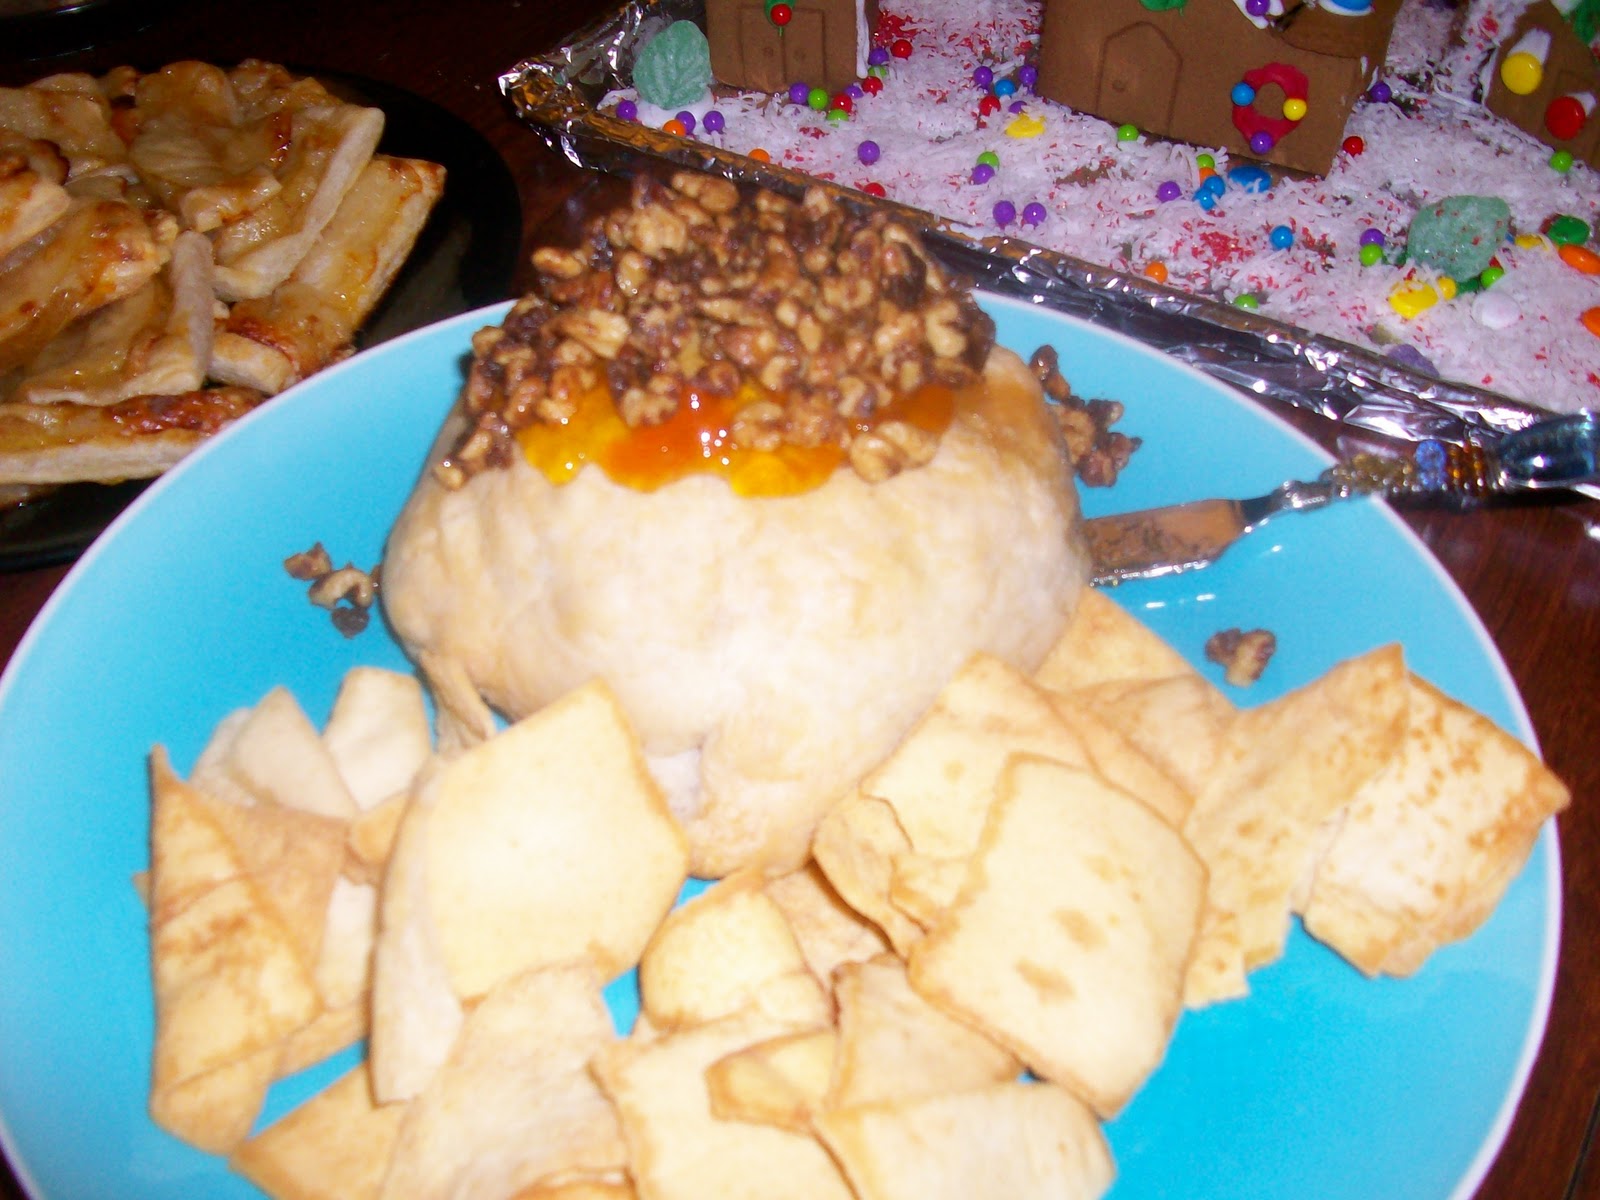
Baked Brie
This dish is easy to make and is a good alternative to your basic cheese and cracker plate. This was a big crowd pleaser and really dresses up an appetizer spread. The combo of cheese, nuts, and fuit is always tasty. Next time I make this I will be sure to get a picture of the ooy gooy inside :)
Recipe:
One round of brie
One sheet of puff pastry
Apricot jam (or cranberry jam if you want to be super festive)
1/2 cup walnuts
2 tbs butter
3 tbs brown sugar
Pinch of cayenne pepper
Preheat over to 400 degrees. Bring butter, brown sugar, and cayenne pepper to a slight boil. Add walnuts and bring mixture to a simmer. Stir until nuts are coated in mixture and remove from heat. Roll out thawed puff pastry until pliable. Place half of the cooled nut mixture in center of pastry. Spread a few tablespoons of apricot jam on top of brie. Place the brie on top of the nut mixture with the apricot jam side down. Fold the puff pastry around the brie and place seam side down on a baking sheet lined with parchment paper. Make a slit in the top of the pastry and bake for 20 minutes or until golden brown. When pastry has cooled slightly, top with more apricot jam and the remaining nuts.

Jake's Take: Honestly, Jake doesn't quite remember the brie. He did love the nuts though. (I think the multiple Christmas shooters may have had something to do with this.)

Now on to the drink portion of this post. We have a bar area set up in our apartment which Jake has claimed as his "man nook". Before the party, we found some cool holiday shooters for him to make for our guests. These included candy cane, gingerbread, apple pie, and chocolate cake shooter.

Candy Cane Shooter
It looks cool when poured correctly but it tastes like cough medicine unfortunately...
Grenadine
Peppermint Schnapps (Clear)
Cream Dementhe (Green)
Add to shot glasses in the order listed above in equal proportions. In order to get the layered effect, use the back of a spoon and place the tip of it on the highest point of the previous liquid added. Slowly pour in addition liquor and repeat for layers.

Jake's Take: While it was good learning how to layer shots, there was nothing he could do to make the cherry and mint combo not taste like NyQuil.

Gingerbread Shooters


Butterscotch schnapps 
Goldschlager
Vodka
Irish Cream
Combine equal parts and enjoy! This one did in fact taste like Christmas in your mouth :)

Jake's Take: Taste's like gingerbread for sure. Might experiment in the future by adding a sprinkle of cinnamon or ginger.

Apple Pie Shooters


Vodka
Apple juice
Whipped Cream
Cinnamon
Combine equal parts vodka and apple juice. Top shots with whipped cream and cinnamon. These go down easy to say the least. Very tasty and who doesn't love apple pie?
Jake's Take: Easy to make but the fact the presentation is awesome it will definitely make it a classic winter time shot.

Chocolate Cake Shooters


Vodka
Frangelico
These babys only have two ingredients but I swear they taste exactly like dark chocolate cake!
Yumm... Jake dipped the glasses in lemon juice and rimmed them in sugar to add some sweetness as well. Add equal parts of both and you're welcome :)

Jake's Take: Definitely a lady pleaser but you can go stronger on the vodka depending on the crowd. If you're among friends, for added effect, he suggests having some sugar to put on your finger to lick afterwards.

And finally for some general merriness!

Our gingerbread town! We won't point out which side I did and which side Jake did...
Phew! That was a long post. In the future I'll only be outlining one or two recipes at a time.


Saturday, December 18, 2010

Chocolate Bacon Bites and Intro


Chocolate Bacon Bites

What could make delicious food even more delicious? A good ol' chocolate smothering of course. That's exactly what came to mind when I made these little wonders. Not only are they interesting and different, they are a tasty crowd pleaser. One of my biggest goals for this blog is to hopefully find and share more of these intriguing recipes and ideas as this blog grows.
Recipe:
16 slices thick cut bacon
2 tablespoons brown sugar
8 oz milk chocolate
1/4 cup of chopped nuts

Preheat your oven to 375 degrees. Once you cut your bacon into bite sized peices, line the bacon on parchment paper and sprinkle with brown sugar. Bake for 20 minutes or until crisp. Melt milk chocolate in microwave for 30 seconds, stir, and repeat until chocolate is completely melted. Dip crisp and fully cooled bacon in melted milk chocolate and place on cooking rack. After all pieces have been dipped, sprinkle chopped nuts over them. Once the chocolate is fully set and cooled, transfer to serving plate. Makes about 48 pieces depending on size.

Now that we have that wonderfulness out of the way, I'll tell you a little about myself.


My husband Jake and I live in Arlington, VA. We were recently wed in May of 2010 and have successfully made it through 7 happy months of married life :) Whether he knows it or not, Jake is my expert taste tester and has and enjoyed the good creations and made it through the bad... (we won't talk about the disputed food sickness that he may or may not have gotten one time). I know cooking as a couple is a lot like marriage. There is a lot of compromise and communication that must go on in order to build mutually agreed on meals and trust in one another to try new things. Enough about that, let's give Jake a quick shout out.

Woot woot! I can hopefully get some feedback out of him about my food creations that I will share with you all. As for the Chocolate Bacon Bites..

Jake's Take : Hesitant at first but after trying them had a hard time remembering why chocolate and bacon wouldn't be "kick ass".  

I hope to update this blog a few times a week and share new and traditional recipes. I may also blog about some exciting life events along the way ;)